Rent rolls are the key to lease-by-lease underwriting and future securitization transparency.
This page shows how to create a “multi” rent roll.
For a chart of rent roll methods and property types, see Add rent roll.
First you’ll create a rent roll, then you’ll add tenants.
Go to the New Rent Roll page
1. Click the Property tab and the Rent Roll sublink.
2. Verify that the proper property is displayed in the property menu.
3. Click the Add New button on top right of the rent roll module.

Enter Rent Roll information
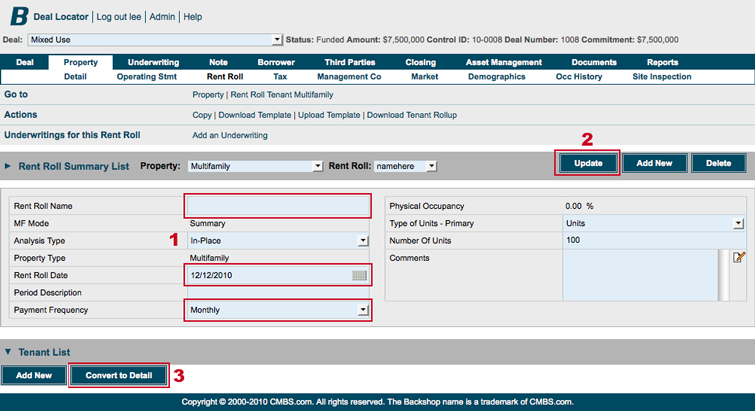
1. Start with required fields: rent roll name, rent roll date and payment frequency. Enter as much or little information as you like. You can always return to this entry.
2. Click the Update button at the top of the rent roll module.
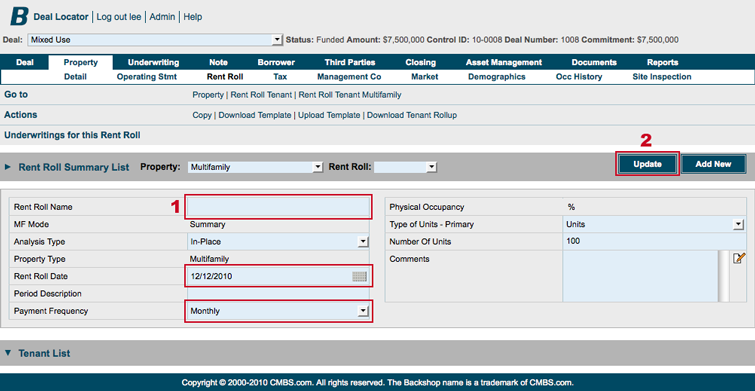
When you click the Update button, your rent roll is created, and your tenant list is enabled.
Enter tenants
Backshop provides two ways to enter tenant information, depending on whether MF Mode (shown directly below rent roll name) is set to summary or detail.
Summary mode
This is the default mode. It lets you enter groups of tenants that share tenant type, unit type and floor plan.
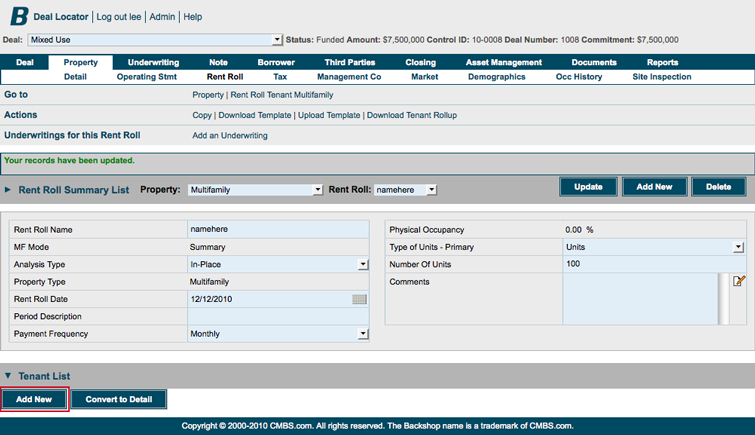
In the rent roll page’s tenant list module, click the Add New button.
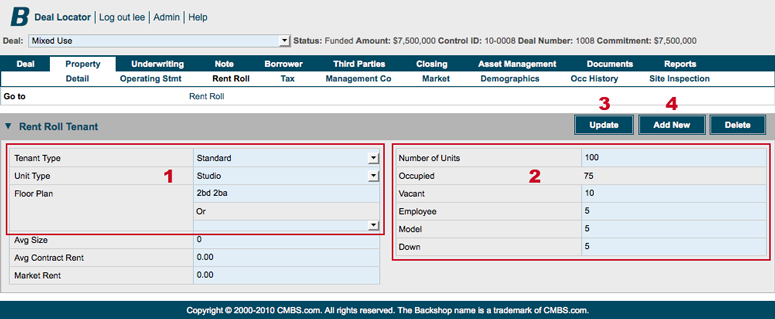
1. Start with the required information: Enter or confirm the tenant type and unit type. Enter or choose a floor plan.
2. Enter the total number of units of this type, as well as the different statuses of non-occupied units: vacant, employee, model and down.
3. Click the Update button. You can always modify your tenant listing later.
4. To add another tenant group, click the Add New button.
Detail mode
Detail mode lets you enter tenant-by-tenant information rather than summarizing tenants into groups. To switch from the default summary mode to detail mode:
1. Enter or verify required Rent Roll Information.
2. Click the Update button if you haven’t already done so.
3. Click the Convert to Detail button.
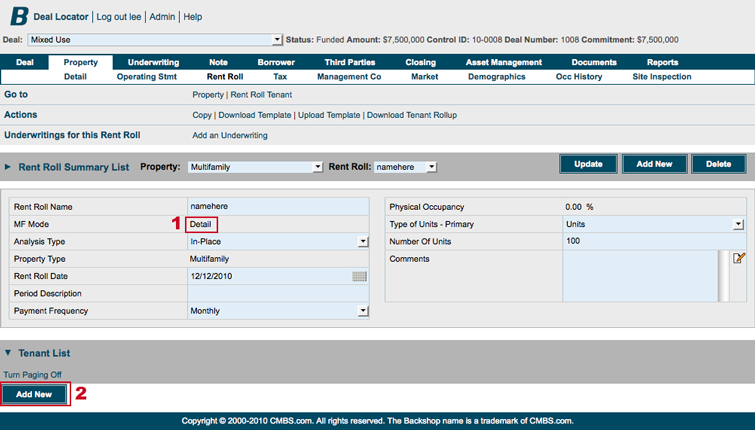
1. Note that MF Mode has changed from Summary to Detail.
2. Click Add New button in the tenant list module
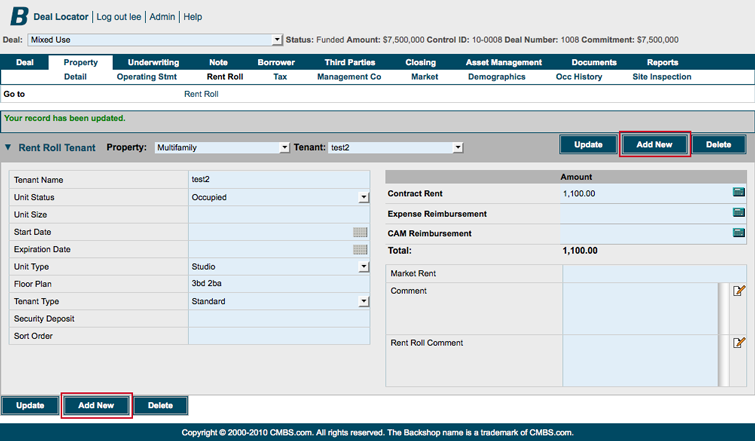
1. Start with required fields: tenant name, floor plan and contract rent amount. Enter as much or little information as you like. You can always return to this entry.
2. Click the Update button to save this information.
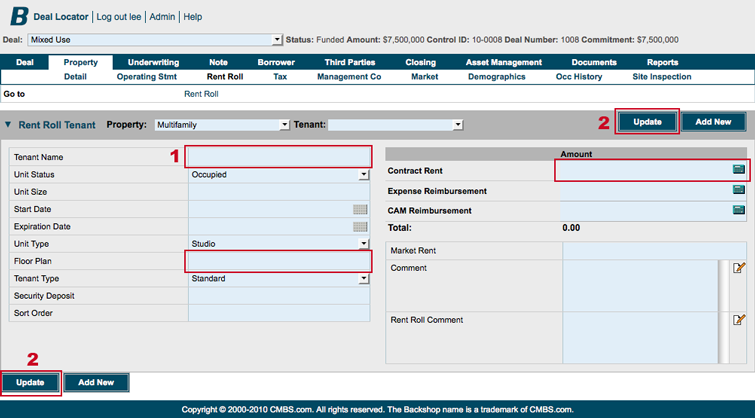
To add another individual tenant, click the Add New button. Repeat for your remaining tenants.
